[GUIDE] Register Your Company in Estonia with a 3-Step Online Setup
![[GUIDE] Register Your Company in Estonia with a 3-Step Online Setup | Companio](https://companio.co/wp-content/uploads/2022/11/register_company_in_estonia.png)
Are you wondering how to register your company in Estonia and where to start? Then this article is for you.
With Companio, you can register in just a simple 3-step online Process and start with the opening and registration of your company. Would you like to know how? Keep reading. 👀
Table of contents
How to Register Your Business in 3 Steps
Incorporate your business in Just 5 minutes with these 3 quick and easy online steps.
Step 1: Choose your company name
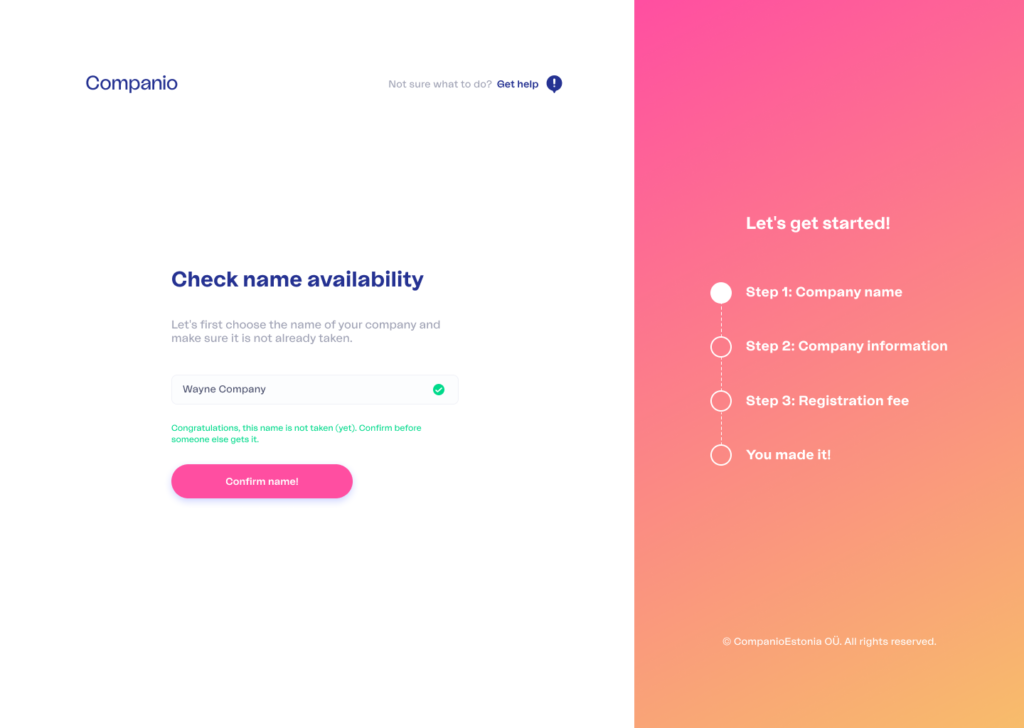
Before deciding on the name of your company, you have to keep this in mind:
✅ Make sure your future company name is not already registered. Choose something unique and distinctive.
✅ Confirm that there is no European or Estonian trademark with a similar name (unless you receive explicit, notarized consent from the owner).
This does not mean you cannot use a name similar to an EU trademark. Still, avoiding confusion between your company name and others is important. People need to be able to identify you and find you.
✅ The name of your company must be written in the Latin alphabet and can be without any special symbol.
✅ A limited company in Estonia is called osaühing. This is shortened to OÜ at the end of your company’s legal name.
Once you have decided on your company’s name, you can write it on the Companio platform. Consider this:
⚠️ If a name of any matching brand or company exists, you will be asked to provide another name.
⚠️ If there are similar company names that may pose a problem for registration, you will receive a warning.
⚠️ If you see a message that says, “The name could not be checked. You can continue with the registration, but we may ask you to change the company name “, that means that we were unable to consult the Registry to verify if the chosen name already exists.
We’ll contact you later if your chosen name isn’t available so you can select a different one.
Step 2: Add company information

✅ Specify your business activity and the means of communication (e.g., email, phone number).
✅ You must also select the field of activity that best describes the company’s business activities, which must be as detailed as possible.
✅ Identifies the members of the company.
To add members, you need to click the “+” button that says “add director.”
You will then be asked to add relevant information about shareholders and board members. For each member you add, you have to decide whether they will be a shareholder, board member, or both. You can also specify whether this person will be the company’s representative (for accounting and business issues).
If company members already have their e-resident cards, great! They will be able to sign the company registration immediately. Otherwise, don’t worry: add your date of birth to ensure signatures are sent to the right person.
The wizard will not let you continue until the information from these members is correct. Several aspects will be checked:
- At least one shareholder must be listed.
- At least one board member must also appear.
- You must add the sum of the shares of all the shareholders. This must be equal to the total share capital of the company.
For example, imagine that your company has declared a share capital (in the previous step) of €2000, and you have added three members as shareholders:
- John Smith: with €500 of share capital.
- Anna Svanovich, with 1000€.
- Eleanor Stanson, €500.
If the numbers don’t match, you may need to delete a member and add it again. For example, you may need to add a board member, or the number of shares must be corrected.
✅ Once the information about the members and all the share capital has been distributed correctly, the assistant will allow you to continue with the next step: payment.
Step 3: Pay the registration fee

Before payment, you will be directed to a screen to verify that all the information is correct. Then, review everything again because the price of the company’s registration may vary in certain circumstances (for example, when there are multiple members).
If you need to change something, go back to the steps above. Then, if all is well, proceed to payment by clicking on “Submit.”
Register Your Company From the Dashboard
Verify your e-resident card

✅ When all partners have their e-resident cards, they can digitally sign the company registration and service contract. This step is vital to ensure the consent of all members.
✅ The online wizard contains information about who has signed and who has not. The members (including you) will receive a separate email with a link to sign. If any of them haven’t received an email, you can send them the link again by clicking the “Send Signature Link” button next to their names.
✅ If some members are not yet e-residents, you will need to wait until they receive their e-Residency cards before continuing. But don’t worry. You can continue the process at any time after they’ve received it. Just save the signature email for later or send them the signature link again later.
By updating this page, you’ll be able to track the signing process and verify already added signatures.
✅ The next step is to use your USB reader.
- By clicking on the signature link you receive in your email, you will see a screen with two buttons: one to see the contract you are signing and another to add your signature.
- Review the contract to verify everything is correct, and prepare your ID card to sign.
- Connect the USB reader to your computer and insert the e-Resident card. Wait until the reader light comes on.
- Make sure you have installed the drivers, plugins, and software needed to allow the browser to read the card. Also, ensure that the card has been inserted correctly and that the reader reads it (we recommend opening the DigiDoc software). If the card is detected, your name will appear in the app.
- Click “Add my signature.” Wait a few seconds. The system will ask you to choose the certificate and then the PIN2. Type it and click Enter.
- If everything goes well, you’ll see a message stating that the signature has been added. All members should follow this procedure. The representative can review the progress of this process on the onboarding screen.
Verify your work email

✅ Once the last member has signed the contract, all signatures must be verified. After that, your company’s application for registration in the e-Business registry will proceed, and information about the company and all its members must be added.
✅ You will receive a registration email to the corporate email address specified in Step 2. This email (from e-Äriregistri Teavitus) will contain a link to verify your company’s corporate account.
If you have not received the email within 48 hours, please inform Companio that all company members have signed and are waiting for the email to confirm their corporate email account.
✅ Once you’ve received that email and clicked the confirmation link, click “Done” (or send us a message so we can proceed to the next step).
Sign the application

All company members must sign the application for registration of the company in the Registry.
Why are you signing twice? 🤔
- The first signature (in Step 5) was for the service contract with Companio. We needed those signatures to verify your identity and confirm that all members are e-residents.
- You must now sign to confirm that you intend to register the company.
✅ Follow the instructions in the screen. First, log in to the e-Business registration and add your signature using your PIN2. Verifies that members appear with the corresponding roles and that the company information is correct. Even machines can make mistakes sometimes.
✅ All members must add their signatures. Once this is done, click ‘Done’ (or send us a message so we can move on to the next stage).
Relax while Companio takes care of the rest
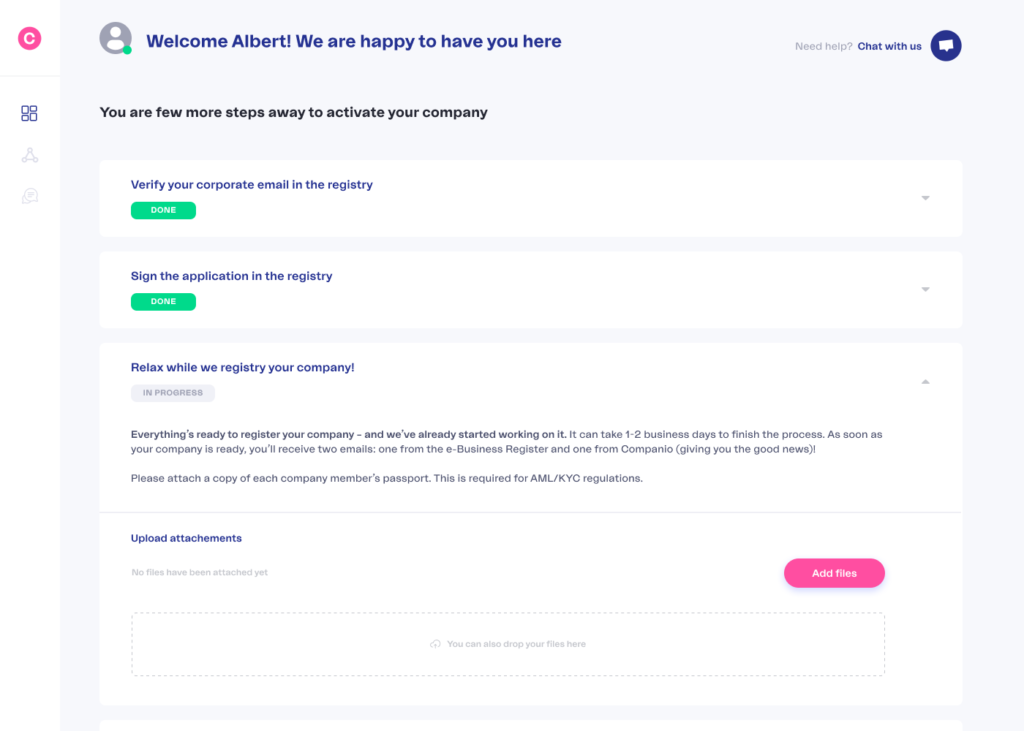
✅ Companio will complete the application at the Registry and make payment of the notarial and state fees. This step usually takes 24 hours. The registration will confirm this within a few hours of receiving these payments and after verifying that the information is correct.
In the meantime, we’ll need a copy of all members’ passports. This is because we take the protocol for preventing money laundering seriously.
✅ Once the company is registered, you will receive a document with the entry in your company’s register. This document contains your company’s registration code (the number that identifies it).
This registration code and your company name and address must be included on every invoice issued to customers.
Last Steps
Open a bank account
Opening a bank account for your business may take several days, depending on the bank, and you may be asked for documents.
Are you hesitating between a traditional bank and a digital bank?
In that case, you should read this article. However, we always recommend digital banks since you can open a 100% online bank account, avoiding unnecessary trips, and it usually works much faster.
If you need to know which digital bank to choose, you can find the 5 best digital banking solutions for e-residents in this article.
In addition, at Companio, we have partnered with Intergiro to make it even faster and easier to open your account. Basically, you grant us permission, and we process the opening of your account for you.
That’s why we called it 1 Click-Opening. With a single click, you can open your company bank account and start invoicing quickly.
Grant a Power of Attorney for Accounting
Next, you must grant us power of attorney to manage your company’s accounting and submit the VAT application. This can be done online without a notary, and you can revoke it anytime. If you want to know how to do it, read this article.
Decide if you want to have VAT number
Please let us know if you would like us to request a VAT number for your company. Then, we will prepare that application and register your company in the European VIES archive.
To complete this step, we will need your company to already have a valid bank account (we need to add their company’s IBAN number to the request). We will also ask for certain information to provide to authorities, such as who their customers are and what revenue you estimate they have.
Frequently Asked Questions
Can a foreigner start a business in Estonia?
Yes! Actually, Estonia is a great place for foreigners to start a business. Thanks to e-Residency you can sign documents and register a company in Estonia without ever visiting the country.
How long does it take to register a company in Estonia?
Once you have obtained your e-Residency, it takes up to 3 working days. You must get confirmation from the e-Business Register that your company is registered.
How much does the e-Residency cost?
The cost is €100 plus €20 in shipping fees, so it is a total of €120.
If you pick up your card at e-Residency at “collection centres” in Sao Paulo, Johannesburg, or Bangkok an additional fee of €23,60 is applied.
On this page, you can find more information about the pickup locations.
What are the requirements for company registration in Estonia?
Once you have become an e-resident, you will need the following:
- The e-Residency card.
- A copy of your passport.
- Legal address and contact person for your company. At Companio we give you this for free.
How much does it cost to register a company in Estonia?
The state fee for registering a company in Estonia is €265.
If you are thinking about starting a business in Estonia, you do not have to do it on your own. At Companio, we help you with the registration process, opening a bank account, and all the hard work: accounting, payroll, and tax reports.
Do you want to see how we can help you? Click on this link.
 Silvana Lucido
